

You need to handle orthodontic pliers with precision and care. Select the right tool for each task. can help you achieve safe, accurate results. Always keep your instruments clean and well-maintained to protect your patients.
Key Takeaways
- Choose the right orthodontic plier for each task to ensure accuracy and protect your patient.
- Hold pliers with a steady grip and apply the correct force to avoid injury and improve results.
- Clean, sterilize, and maintain your pliers daily to keep them safe, sharp, and long-lasting.
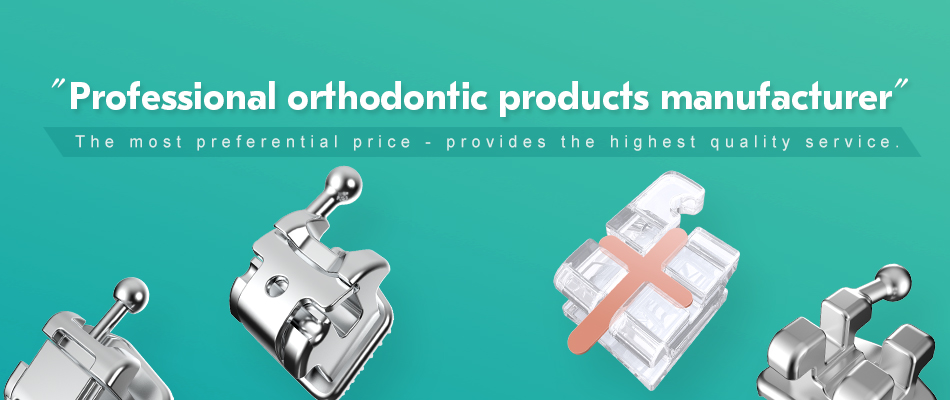
What Are Orthodontic Pliers?
Main Functions in Dental Procedures
Orthodontic pliers play a vital role in dental care. You use these tools to bend, cut, and adjust wires during orthodontic treatments. Pliers help you place and remove bands, brackets, and other appliances. You rely on them to make precise adjustments that guide teeth into the correct position. Each type of plier serves a specific function, so you must choose the right one for each task.
Tip: Always match the plier to the procedure. Using the correct tool improves accuracy and reduces the risk of injury.
Here are some main functions of orthodontic pliers:
- Bending and shaping archwires
- Cutting excess wire ends
- Placing and removing elastic ligatures
- Adjusting bands and brackets
- Removing orthodontic appliances safely
You can see that pliers are essential for both routine adjustments and complex procedures.
Key Features of Quality Pliers
When you select orthodontic pliers, you should look for several important features. High-quality pliers make your work easier and safer. They also last longer and provide better results for your patients.
| Feature | Why It Matters |
|---|---|
| Stainless Steel Build | Resists rust and corrosion |
| Precision Tips | Allows accurate wire manipulation |
| Comfortable Grip | Reduces hand fatigue |
| Smooth Joints | Ensures easy, controlled movement |
| Durable Construction | Withstands repeated sterilization |
You should inspect your pliers regularly. Check for sharpness, alignment, and smooth operation. Quality tools help you deliver the best care and protect your patients from harm.
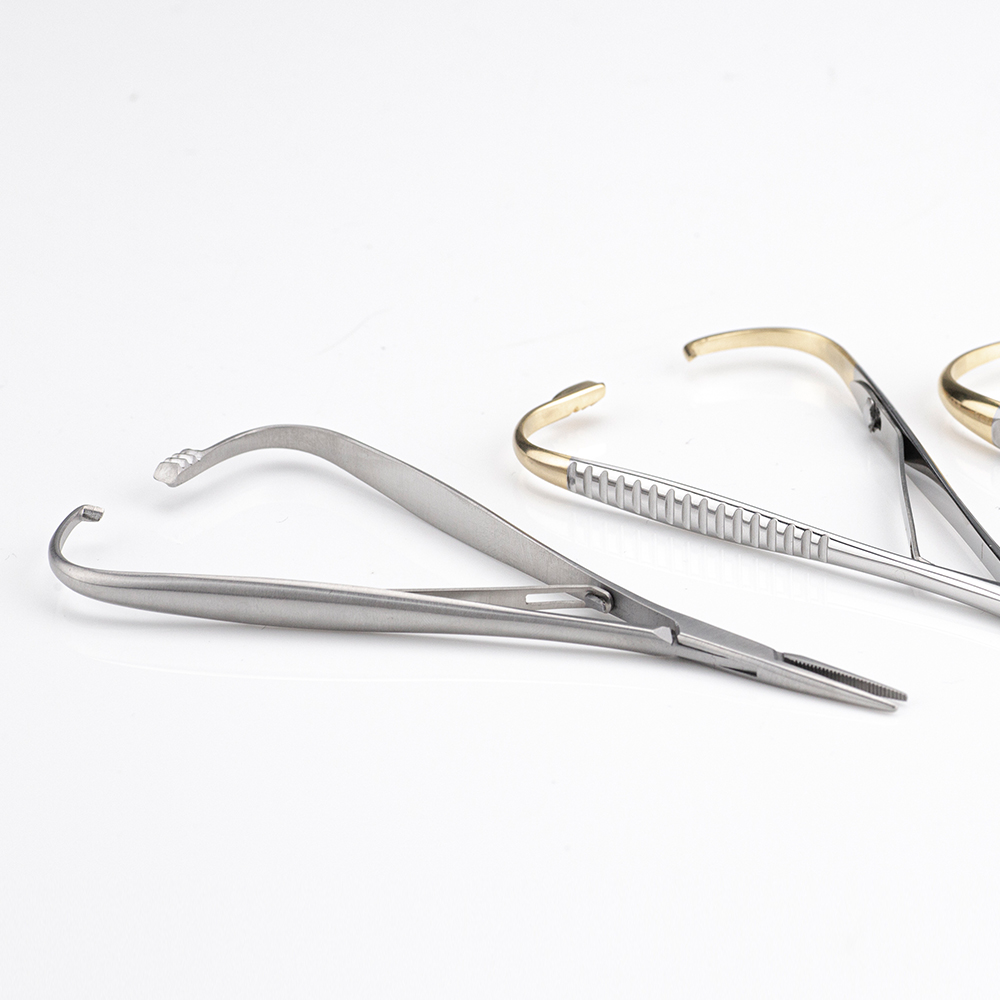
Types of Orthodontic Pliers and Their Uses
Utility Pliers
You use utility pliers for many basic tasks in orthodontics. These pliers help you hold, bend, and adjust wires. You can also use them to place or remove small parts. Their flat, smooth tips prevent damage to wires and appliances.
Tip: Always check the tips for wear before each use. Smooth surfaces protect delicate wires.
Ligature Cutters
Ligature cutters allow you to snip thin wires and elastic ligatures with precision. You need these pliers to trim excess wire ends after securing brackets. The sharp blades give you a clean cut, which keeps your patient comfortable.
Band Removing Pliers
You use band removing pliers to take off orthodontic bands safely. The special design protects teeth and gums during removal. The cushioned tip rests on the tooth, while the other end lifts the band away.
Weingart Pliers
Weingart pliers help you guide and place archwires into brackets. Their tapered, serrated tips grip wires firmly. You can reach tight spaces in the mouth with ease.
Bird Beak Pliers
Bird beak pliers have one round and one flat beak. You use them to bend and form loops in wires. These pliers work well for shaping and adjusting archwires.
Distal End Cutters
Distal end cutters let you trim the ends of archwires at the back of the mouth. The design holds the cut wire, so you avoid loose pieces.
Three-Jaw Pliers
Three-jaw pliers help you make precise bends in rectangular wires. The three tips hold the wire steady, so you can shape it accurately.
Hollow Chop Pliers
You use hollow chop pliers to contour and adjust bands. The hollowed-out tip fits around the band, making adjustments easy and safe.
Note: Choosing the right plier for each task improves your efficiency and protects your patient’s comfort.
Do you know how dentists use orthodontic forceps correctly? Usage of orthodontic forceps
Proper Grip and Hand Position
You need to master the proper grip when you use orthodontic pliers. starts with how you hold the instrument. Place your thumb and index finger on the handles. Rest your middle finger for extra support. This grip gives you control and helps you avoid slips. Keep your wrist straight. Do not twist your hand. You should always check your hand position before you begin any procedure.
Tip: A steady grip reduces hand fatigue and improves accuracy.
Applying the Right Amount of Force
You must apply the correct force when using orthodontic pliers. involves knowing how much pressure to use. Too much force can damage wires or hurt your patient. Too little force may not move the appliance at all. Always start with gentle pressure. Increase it only if needed. Watch your patient’s reaction. If they show discomfort, stop and adjust your technique.
Here is a simple guide:
| Task | Recommended Force |
|---|---|
| Bending thin wires | Light pressure |
| Cutting ligatures | Moderate pressure |
| Removing bands | Firm, steady pressure |
Ensuring Patient Comfort and Safety
You play a key role in patient comfort. means you must always check that the pliers do not pinch the lips or cheeks. Use cotton rolls or cheek retractors if needed. Speak to your patient during the procedure. Ask if they feel any pain. Adjust your technique if they do. Always keep the working area dry and clear. This helps you see better and keeps your patient safe.
- Check for sharp edges on the pliers before use.
- Use slow, controlled movements.
- Reassure your patient throughout the process.
Avoiding Slips and Instrument Damage
You need to prevent slips and protect your tools. includes checking the pliers for wear or damage before each use. Worn tips can slip off wires or brackets. Always dry your hands and the instrument handles. Wet surfaces increase the risk of accidents. Store your pliers properly after cleaning. This keeps them sharp and aligned.
Note: Regular inspection and careful handling extend the life of your orthodontic pliers.
You can see that covers every step, from grip to storage. When you follow these steps, you protect both your patient and your instruments.
Cleaning, Sterilization, and Maintenance
Daily Cleaning Steps
You need to clean your orthodontic pliers after every use. Start by rinsing them under running water to remove debris. Use a soft brush to scrub the joints and tips. Pay attention to areas where residue can hide. Dry the pliers with a lint-free cloth. Inspect them for stains or leftover particles. Clean tools help you prevent infections and keep your instruments in top condition.
Tip: Always wear gloves during cleaning to protect your hands and maintain hygiene.
Sterilization Protocols
You must sterilize your pliers before each procedure. Place them in an ultrasonic cleaner to remove microscopic particles. After cleaning, arrange the pliers in a sterilization pouch. Use an autoclave to kill bacteria and viruses. Follow the manufacturer’s instructions for temperature and cycle duration. Check the sterilization indicator to confirm success.
| Step | Purpose |
|---|---|
| Ultrasonic cleaning | Removes fine debris |
| Autoclaving | Destroys pathogens |
| Indicator check | Confirms sterilization |
Lubrication and Inspection
You should lubricate the joints of your pliers weekly. Apply a small amount of medical-grade lubricant to moving parts. Open and close the pliers to distribute the oil. Inspect the tips for sharpness and alignment. Look for cracks or signs of wear. Well-maintained pliers work smoothly and last longer.
Storage Best Practices
Store your orthodontic pliers in a dry, clean drawer or cabinet. Use trays with individual slots to prevent contact between tools. Keep them away from moisture and chemicals. Label each tray for easy identification. Proper storage protects your investment and ensures your tools stay ready for use.
Note: Organized storage reduces the risk of damage and saves you time during busy procedures.
Troubleshooting Common Issues
Dealing with Dull or Damaged Tips
You may notice your pliers do not grip wires as well as before. Dull or damaged tips can cause this problem. Always inspect the tips before each use. If you see nicks, chips, or a worn surface, stop using the tool. Use a sharpening stone for minor dullness. For serious damage, send the pliers to a professional for repair. Never use pliers with broken tips on patients.
Tip: Regular inspection helps you catch problems early and keeps your procedures safe.
Fixing Misalignment
Misaligned jaws can make your work difficult. You might see the tips do not meet evenly. This can bend wires incorrectly or slip off appliances. To fix minor misalignment, use a small wrench to adjust the joint. For severe cases, contact the manufacturer or a repair service. Do not try to force the jaws back into place.
Removing Stains and Corrosion
Stains and corrosion can appear if you do not dry your pliers well after cleaning. Use a soft brush and a mild cleaner to remove stains. For light rust, apply a rust remover made for dental tools. Rinse and dry the pliers completely. Store them in a dry place to prevent future problems.
When to Replace Your Pliers
You should replace your pliers if you see cracks, loose joints, or repeated dullness. Old or damaged pliers can harm your patient or ruin your work. Keep a log of each tool’s condition. Replace pliers that fail inspection or cannot be repaired.
Note: Quality tools support your best work and protect your patients every day.
Daily Checklist for Safe and Effective Use
Pre-Procedure Inspection
You should start each day by inspecting your orthodontic pliers. This habit helps you catch problems before they affect your work. Look for signs of wear, rust, or damage. Check the tips for sharpness and alignment. Make sure the joints move smoothly. Test the grip to confirm it feels comfortable in your hand.
Use this quick checklist before every procedure:
- Examine tips for chips or dullness.
- Confirm jaws align properly.
- Test joint movement for smooth action.
- Inspect handles for cracks or loose parts.
- Ensure pliers are clean and dry.
Tip: If you find any issues, set the pliers aside and use a backup tool. Never risk patient safety with a damaged instrument.
Post-Procedure Care
After each procedure, you need to care for your pliers to keep them in top condition. Rinse them under running water to remove debris. Use a soft brush to clean the joints and tips. Dry the pliers with a lint-free cloth. Place them in a sterilization pouch and follow your clinic’s sterilization protocol.
Here is a simple table for post-procedure care:
| Step | Purpose |
|---|---|
| Rinse & Brush | Remove debris |
| Dry Thoroughly | Prevent rust |
| Sterilize | Kill germs and viruses |
| Store Properly | Avoid damage |
You protect your tools and your patients when you follow these steps every day. Consistent care extends the life of your orthodontic pliers and ensures safe, effective dental procedures.
- Select the correct orthodontic pliers for each procedure.
- Handle your tools with care and precision.
- Clean and maintain your instruments daily.
Following these steps helps you protect your patients, prevent instrument damage, and achieve reliable results in every dental procedure.
FAQ
How often should you sterilize orthodontic pliers?
You must sterilize orthodontic pliers before every patient. This practice prevents infection and keeps your instruments safe for use.
Tip: Always check the sterilization indicator after each cycle.
What should you do if your pliers become misaligned?
Stop using misaligned pliers immediately. You can contact a professional repair service or the manufacturer for adjustment.
| Action | Result |
|---|---|
| Stop using | Prevents damage |
| Seek repair | Restores function |
Can you use the same pliers for different procedures?
You should not use the same pliers for every procedure. Each type has a specific purpose. Select the correct plier for each task.
- Utility pliers: General adjustments
- Ligature cutters: Cutting wires
- Band removing pliers: Removing bands
Post time: Aug-14-2025