

Introduction
Bracket bond failure is more than a minor interruption in orthodontic care: it can delay tooth movement, increase emergency visits, and add avoidable time to treatment. Preventing it requires attention to both clinical technique and the adhesive system used at each step, from enamel preparation and moisture control to bracket positioning and curing. This article explains the main causes of bond failure, the benchmark rates that signal a problem, and the practical measures that improve bracket retention in daily practice. By the end, readers will have a clearer framework for reducing failures, protecting treatment efficiency, and improving patient outcomes.
What Is Bracket Bond Failure and Why Does It Matter
Reliable bracket adhesion is foundational to the efficiency and success of modern orthodontic treatment. When a bracket detaches from a tooth surface prematurely, it disrupts the biomechanical forces required for tooth movement, leading to compromised clinical outcomes and extended treatment timelines.
In a well-managed clinical setting, the universally accepted benchmark for bracket bond failure rates is typically between 5% and 10%. Exceeding this threshold indicates a systemic flaw in material selection, clinical technique, or patient compliance management. Understanding the mechanics of this failure is the first step toward implementing corrective protocols.
Why bracket bond failure increases chair time
The immediate consequence of bracket bond failure is a significant increase in unscheduled chair time. Replacing a single bracket requires removing residual composite, re-pumicing, isolating, etching, priming, and repositioning the new bracket. This sequence typically consumes 10 to 15 minutes of clinical time.
Beyond the immediate appointment disruption, unaddressed bond failures cascade into prolonged treatment durations. Clinical studies indicate that every bracket failure can extend a patient’s overall treatment timeline by 1 to 2 months. This not only diminishes practice profitability by increasing the overhead cost per patient but also negatively impacts patient satisfaction and compliance.
How to define bracket bond failure clearly
Bracket bond failure is technically defined as the unintended detachment of an orthodontic bracket from the enamel surface prior to the planned debonding phase of treatment. To diagnose the root cause, clinicians must classify the failure based on the Adhesive Remnant Index (ARI), which identifies where the fracture occurred.
Failure can occur at the enamel-adhesive interface (indicating poor etching or moisture contamination), within the adhesive itself (cohesive failure, suggesting incomplete curing or expired material), or at the bracket-adhesive interface (pointing to inadequate mesh penetration or base contamination). For optimal performance, the shear bond strength (SBS) must fall within a specific therapeutic window: 6 to 8 Megapascals (MPa) is generally required to withstand masticatory and orthodontic forces, while exceeding 14 MPa significantly increases the risk of enamel fracture during scheduled debonding.
What Causes Bracket Bond Failure During Orthodontic Treatment
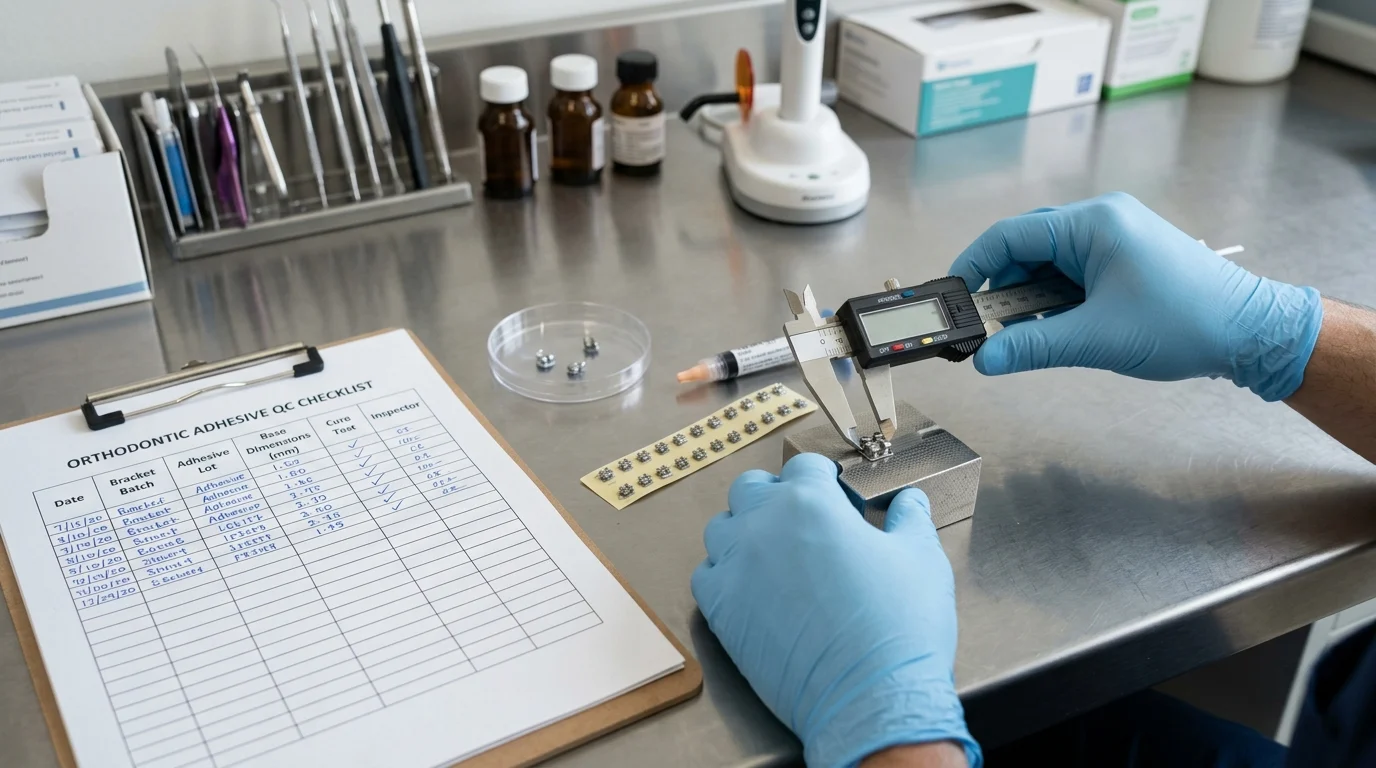
Bracket detachment is rarely the result of a single error; it is typically a multifactorial issue involving clinical execution, material science, and patient variables. Identifying the specific cause requires a systematic review of the bonding environment and the physical forces applied to the bracket.
By isolating variables such as moisture control, adhesive mechanics, and occlusal interference, practitioners can pinpoint exactly where their bonding protocol is breaking down.
How enamel condition and moisture affect bond strength
The condition of the enamel and the presence of moisture are the most critical determinants of bond longevity. Saliva, blood, or crevicular fluid contamination during the bonding process is the leading cause of failure, capable of reducing shear bond strength by 30% to 50%. Even ambient humidity from patient respiration can compromise the micro-mechanical retention created by the etchant.
Enamel preparation also dictates success. The standard protocol requires 15 to 30 seconds of etching with 37% phosphoric acid to create adequate microporosity. However, atypical enamel conditions, such as fluorosis, hypomineralization, or the presence of deciduous teeth, contain altered prismless enamel layers that resist standard etching, necessitating extended etch times or microabrasion to achieve the baseline 6 MPa bond strength.
How bracket design and adhesive choice influence failure
The physical characteristics of the bracket base play a significant role in mechanical retention. Foil-mesh bases, particularly those utilizing an 80-gauge mesh, provide an optimal surface area for adhesive interlocking. If the mesh is too fine, viscous composites cannot penetrate; if too coarse, the adhesive mass weakens.
Choosing high-quality bracket adhesive orthodontics ensures that the composite resin possesses the correct viscosity to flow into the bracket base while resisting pre-cure drift. Adhesives with excessive filler content may offer high compressive strength but lack the flowability necessary to wet the bracket mesh completely, leading to bracket-adhesive interface failures.
How patient behavior and occlusal forces contribute
Even with perfect isolation and ideal materials, external forces can overwhelm the bond. Masticatory bite forces in the posterior segments can easily exceed 200 to 500 Newtons. When patients ignore dietary restrictions and consume hard, crunchy, or sticky foods, the resulting shear and tensile stresses fracture the adhesive layer.
Occlusal interferences also contribute heavily to early failures. In cases of deep overbite or severe crowding, the opposing dentition may strike the newly placed brackets during functional movements. If a bracket is subjected to continuous occlusal trauma exceeding the 8 MPa threshold of the adhesive, detachment is inevitable unless bite turbos or bite plates are deployed to disocclude the teeth.
Which Adhesives and Bonding Protocols Reduce Bracket Bond Failure
Selecting the appropriate adhesive system is a critical decision that dictates both clinical workflow and bond reliability. The market offers a variety of chemical formulations, each engineered to address specific clinical challenges such as moisture control, working time, and enamel protection.
The evolution of bracket adhesive orthodontics has prioritized finding the perfect equilibrium between robust intra-treatment retention and safe, predictable debonding at the conclusion of therapy.
How light-cure, self-cure, dual-cure, and glass ionomer options compare
Light-cure composite resins remain the industry standard, offering extended working times that allow for precise bracket positioning before a 10- to 20-second light exposure hardens the material. These typically yield a robust shear bond strength of 8 to 10 MPa. Self-cure adhesives rely on a two-part chemical reaction and are primarily reserved for bonding attachments to opaque surfaces where light cannot penetrate, such as molar bands or metallic crowns.
Resin-modified glass ionomer (RMGI) cements offer a distinct advantage in moisture-compromised environments. Because they are hydrophilic, they perform better than composites in partially isolated fields, such as partially erupted second molars. However, this moisture tolerance comes at a slight cost to overall retention, with RMGIs typically yielding a lower SBS of 5 to 7 MPa.
When to adjust etching, priming, and curing steps
Traditional bonding requires three distinct steps: acid etching, applying a hydrophilic primer, and placing the adhesive paste. While this yields maximum bond strength, it is highly sensitive to saliva contamination between steps. Adjusting this protocol by utilizing Self-Etching Primers (SEPs) combines the etching and priming phases, significantly reducing the window for moisture contamination.
When utilizing SEPs, clinicians must ensure the curing light output is adequate, as the chemical integration relies heavily on deep photon penetration. A minimum curing light intensity of 1,000 mW/cm² is strictly required. If the light intensity drops, the curing time per bracket must be increased from the standard 10 seconds to 20 seconds to prevent cohesive failure within the unpolymerized core of the resin.
What factors to include in an adhesive comparison table
To standardize material selection within a practice, clinicians should evaluate adhesives based on quantifiable performance metrics. A structured comparison ensures that the chosen material aligns with the specific needs of the patient and the operational speed of the practitioner.
| Adhesive Type | Average SBS (MPa) | Moisture Tolerance | Working Time | Recommended Curing Time (at >1000 mW/cm²) |
|---|---|---|---|---|
| Light-Cure Composite | 8.0 – 10.0 | Low | Unlimited | 10 – 20 seconds |
| Resin-Modified Glass Ionomer | 5.0 – 7.0 | High | 2 – 3 minutes | 10 – 20 seconds |
| Self-Etching Primer + Resin | 7.0 – 9.0 | Moderate | Unlimited | 15 – 20 seconds |
| Self-Cure (Chemical) Resin | 7.0 – 9.0 | Low | 1 – 2 minutes | N/A (Chemical set: 3-5 min) |
How Can Practices Prevent Bracket Bond Failure
Preventing bracket bond failure requires transitioning from theoretical material science to strict, repeatable clinical operations. Variations in how assistants prepare the teeth or how materials are stored can introduce hidden weaknesses into the bonding interface.
By implementing standardized operating procedures, orthodontic teams can eliminate the micro-errors that compound into macro-failures, thereby stabilizing overhead costs and keeping treatments on schedule.
What step-by-step bonding protocol improves consistency
A step-by-step, non-negotiable bonding protocol is the strongest defense against failure. This begins with prophylaxis; teeth must be polished using a plain pumice slurry. Utilizing prophy pastes containing fluorides, flavoring oils, or glycerin can leave a microscopic residue that reduces bond strength by up to 15%.
Following prophylaxis, absolute isolation must be achieved using cheek retractors, tongue guards, and high-volume suction. The etchant should be applied precisely for 30 seconds, rinsed thoroughly for 10 seconds, and dried with oil-free, moisture-free compressed air until the enamel exhibits a chalky white appearance. The primer must be applied in a thin, uniform layer, followed by the firm seating of the bracket to extrude flash, which must be meticulously removed before curing.
How teams can standardize storage, inventory, and curing light checks
Material degradation is a silent contributor to bond failure. Adhesives and primers contain volatile chemical components that degrade when exposed to heat or ambient light. Practices must enforce strict inventory storage rules, typically requiring refrigeration between 2°C and 8°C. However, cold composite is highly viscous and may fail to penetrate the bracket mesh; therefore, materials must be brought to room temperature for at least 1 hour prior to the bonding appointment.
Equipment maintenance is equally vital. The diodes in LED curing lights degrade over time, dropping output intensity imperceptibly. Clinical teams must test curing lights weekly using a dental radiometer to verify the output remains above the 1,000 mW/cm² threshold. If equipment fails or materials expire, practices should utilize vendor contact us portals to rapidly secure replacements and avoid using compromised stock.
Which metrics should be tracked to monitor failure rates
To proactively manage quality, practices must track specific failure metrics rather than relying on anecdotal observation. Tracking failure rates allows the clinical director to identify patterns—such as whether failures are isolated to a specific quadrant, a specific clinical assistant, or a particular batch of adhesive.
A healthy practice should target an overall failure rate of under 5%. If data reveals that lower second molars have a 12% failure rate, the practice can specifically target moisture control protocols for that region.
| Metric Tracked | Healthy Benchmark | Action Required if Benchmark is Exceeded |
|---|---|---|
| Overall Practice Failure Rate | < 5% | Comprehensive review of materials and curing equipment. |
| Posterior Tooth Failure Rate | < 8% | Retrain staff on isolation techniques and saliva management. |
| Failures Within 48 Hours | < 2% | Investigate immediate moisture contamination or expired primer. |
| Failures After 6 Months | < 3% | Review patient dietary compliance and occlusal interference. |
How Should Clinicians Choose the Right Adhesive Strategy
Choosing the right adhesive strategy is not about finding the strongest possible glue, but rather identifying the optimal material that balances retention during treatment with safe removal afterward. Clinicians must tailor their approach based on the specific demands of each case.
A rigid, one-size-fits-all protocol inevitably leads to compromises, whereas a strategic, criteria-driven approach ensures predictability across diverse patient presentations.
What criteria should guide adhesive and protocol selection
The primary criteria guiding adhesive selection are the bracket material, the tooth surface, and the patient’s biological environment. For instance, polycrystalline ceramic brackets lack the flexibility of stainless steel. If bonded with an excessively strong composite (yielding >14 MPa), the risk of enamel tear or bracket shattering during debonding increases dramatically. In these cases, clinicians often select adhesives specifically formulated for ceramics, which fracture predictably at the bracket interface.
Surface substrate also dictates the protocol. Bonding to pristine enamel allows for standard composite resins, but bonding to porcelain crowns, gold restorations, or amalgam requires specialized surface conditioning—such as hydrofluoric acid etching or silane coupling agents—and often benefits from highly filled, chemically cured resins to ensure stability.
How to balance bond reliability, enamel safety, and appointment efficiency
Ultimately, the goal is to achieve an optimal bond strength of 6
Further reading:
Key Takeaways
- The most important conclusions and rationale for bracket adhesive orthodontics
- Specs, compliance, and risk checks worth validating before you commit
- Practical next steps and caveats readers can apply immediately
Frequently Asked Questions
What is the most common reason brackets debond during treatment?
Moisture contamination is the top cause. Saliva, blood, or crevicular fluid during etching or bonding can sharply reduce bond strength and lead to early bracket loss.
How can clinicians reduce bracket bond failure in daily practice?
Use strict isolation, clean and dry enamel thoroughly, etch correctly, apply primer evenly, and seat the bracket without contamination before full curing.
Does adhesive selection affect bracket bond reliability?
Yes. A well-balanced orthodontic adhesive should flow into the bracket mesh, cure completely, and provide enough strength without making debonding risky for enamel.
What shear bond strength is generally considered safe for orthodontic brackets?
A practical target is about 6 to 8 MPa. This usually withstands treatment forces while reducing the risk of enamel damage during bracket removal.
Where can practices source bracket adhesive orthodontics products?
Practices can review bracket adhesive orthodontics options through DenRotary’s product catalog at denrotary.com to compare materials for routine bonding procedures.

Post time: Jul-02-2026